DIY: Stress-free stencils
Breathe new life into a tired shirt with this stylish and simple stencil technique

They say that if you want it done right, you have to do it yourself.
So, whether you want to pledge allegiance to your favorite band or imitate the Internet’s best dressed, sometimes your best bet is to take matters into your own hands.
Besides, a little freezer paper can go a long way.
This DIY freezer paper stencil tutorial is going to show you the way. Don’t be scared away by those three terrifying letters: this DIY is really almost fool proof.
You need:
-Freezer paper (one side is wax paper)
-Iron
-Small sponge brush
-X-Acto knife
-White t-shirt
-Design image
-Pencil or computer printer
-Cardboard (about the size of your design image)
-Acrylic paint (colours of your choice)
-Textile medium (found in the acrylic paint aisle at craft stores)
Instructions:
Step 1: Gather your materials!
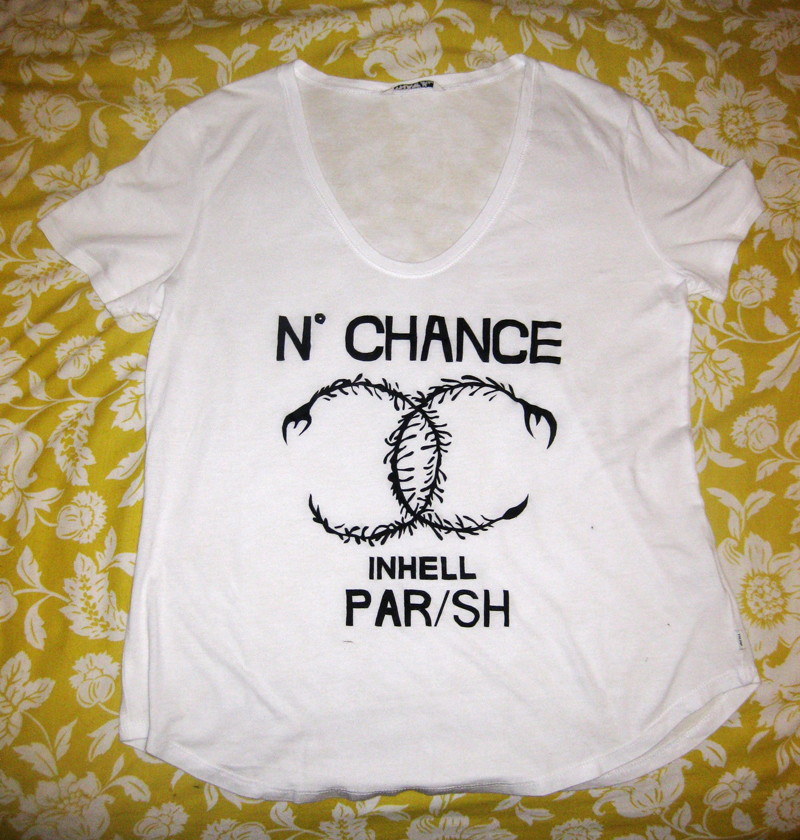
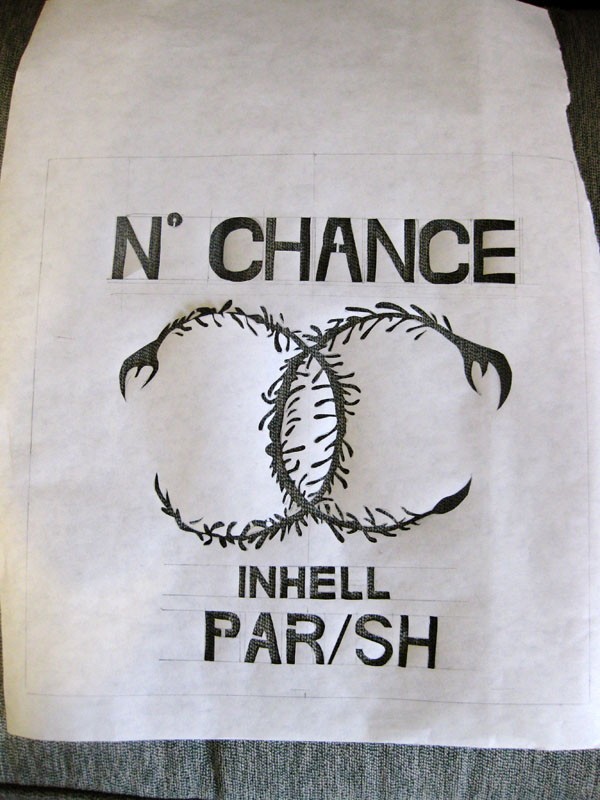
Step 2: The most difficult part of this project will be deciding on a design. This tutorial is for a one-time use stencil, so make it count! If you’re lacking in the idea department, find a design online that you like, and give that a try. The design I used today is from an overpriced shirt I found online. Instead of buying it, I thought, “Oh hey, I can make that!” And make it I did.
If you choose a design you’ve created (or found) on your computer, you can cut your freezer paper into an 8.5 x 11 inch piece and print directly onto the paper side (not the wax side) of the freezer paper.
Or, if you’re living in the stone age - like myself - and do not own a printer, grab a pencil and some freezer paper and knock yourself out.
Step 3: Cut out your design with your X-Acto knife. If you do a lot of crafting (or collaging or the like), I would highly recommend a good cutting blade found at most craft stores. It makes all the difference.
Remember, you’re cutting out the part of your design that you want to show up on your shirt. If you have letters such as an A or a D, make sure to keep track of those letter islands (for lack of a better term) - you’ll need them for later!
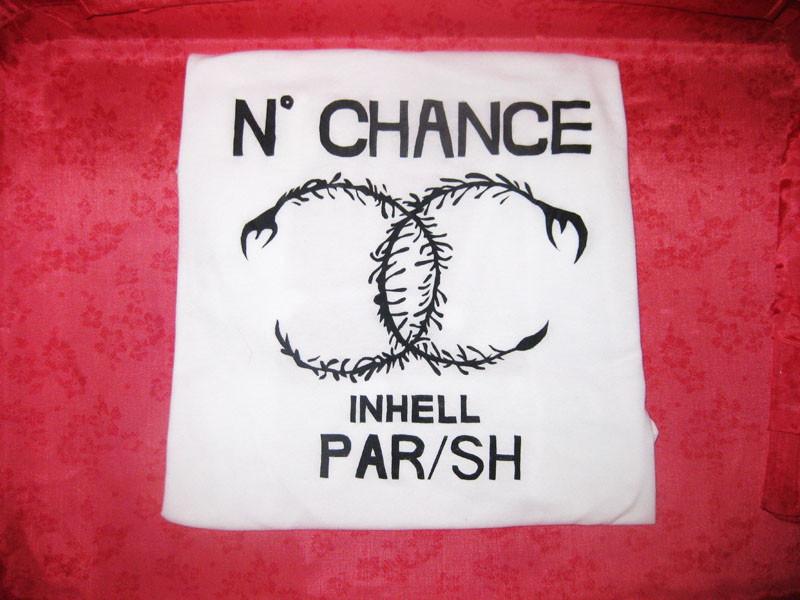
Step 4: Congratulations, you’ve made a stencil. It is time to adhere the stencil to your shirt (or whatever fabric you choose to stencil onto). It’s usually recommended to wash your shirt before starting the craft to avoid shrinkage that may distort your design when you wash it later. However, that being said, I’m impatient and never do this step.
Lay your shirt on a heat friendly environment (or an ironing board, if you’re fancy like that), and position your stencil (wax side down) onto your shirt.
You’ll want to use an iron set on low, with no steam.
When you’re happy with the placement of your stencil, press your iron onto the middle of the design and hold for a few seconds. Continue this movement outwards until you’ve ironed on the entire stencil. It’s a good idea to go over the entire stencil again to make sure it’s in place.
The wax from the paper melts as you iron your stencil, creating a great waterproof barrier between your stencil and the rest of your shirt. This will prevent bleeding when you apply the paint. I’ve tried many different types of homemade stencils, and have found that the freezer paper stencil is the least likely to bleed.
Step 5: Once your stencil cools, mix your Textile Medium and acrylic paint (follow the directions on your Textile Medium to decide how much of each to mix).
Before you start painting, make sure to place a piece of cardboard inside the two layers of your shirt to prevent the paint from soaking through.
Dab your sponge brush into the paint mixture, but do not saturate the brush. You want to layer the paint with light coats to avoid bleeding. As you apply the paint mixture, dab the brush in an up-and-down motion rather than a back-and-forth brushing motion, as your paint will be less likely to sneak under your wax barrier. Let the paint dry between coats.
If you’re impatient, you can use a blow dryer to lessen the drying time.
Step 6: When you’re happy with your paint coverage, and the paint is completely dry, peel off your paper stencil. Voila! Snazzy new shirt.
Published in Volume 67, Number 5 of The Uniter (October 3, 2012)